Project Blog 6 – Final recordings and arrangements

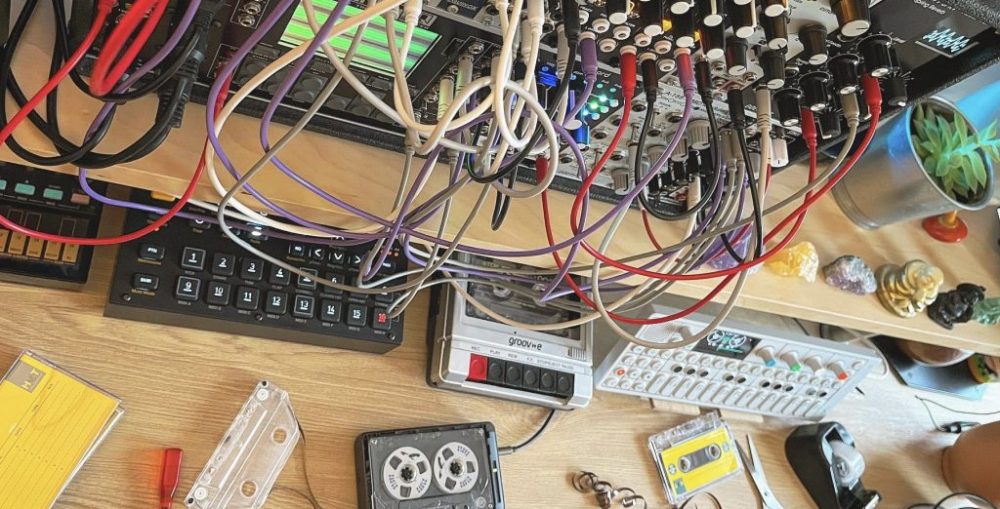
With the fields recordings back in the studio I had something that made everything come together; I added them to the project and I equalised them and compressed accordingly, as well as the rest of the clips. I also recorded a bass sound and a synth lead using MIDI automation and Moog Mavis, this additions resulted on a better progression overall and made the track more interesting. Finally I mixed and balanced all channels and increase a bit the gain on the master channel to get more volume, now I’ll just need to render the whole track and it’s ready to upload!

This project has been very regarding and I have enjoyed every step of the process; this is the last assignment this year, looking forward to complete more units on Year 2.

Ableton project layout at the final stage

Project Blog 5 – Field Recording

I also needed some ambience for my composition so I did a little sound walk on the park with field recordings involved. I was mainly looking for nature sounds like birds and other animals to add give a relaxing mood according with the soothing sounds I have so far. The day was a bit windy and that made a bit difficult the recording but I captured some wind and leaves which I ended up liking in the final mix. I also stayed near a kids playground and recorded voices, shouts and a very organic ambience.

Project Blog 4 – Cassette Tape

An idea that came along during the first steps was to record the main pad chord progression from the modular to cassette tape and from the cassette then back to Ableton, that would give some texture to the sound to achieve a more lo-fi feel that could remind to early ambient and music scores from the 80s. These techniques are being used more commonly in recent years, due to the movements of “nostalgia” trying to recreate obsolete recording methods in order to achieve a retro sound. However, the sound quality can be obviously affected but in terms of experimentation and process I think it could be interesting, I’ve got a Technics cassette deck from 1982 and a new Komplete Audio 6 interface so hopefully the recording will be done properly.

Ableton project taking shape with the first recordings

Project Blog 3 – Experimentation

Now that the main instrument was set up on the studio, the next step was to start experimenting and jamming to see what I could come up with. I created a new project on Ableton and I routed the MIDI channels through the modular sequencer to be able to carefully create some harmonic sequences. I also used the modular synth with the Ensemble Oscillator to compose a warm pad which will be the main base for the composition.

I knew that I wanted to create something simple, quite minimalistic, where later I would add some field recordings. I was trying different chord on the VCO as well as different arpeggios and combinations for a while. After a couple of tries I found something that I enjoyed and that would be the starting point of my composition. You will be able to listen and see the setup on the following video.

Project Blog 2 – Moog Mavis

For the creation of this project I decided to add a new synthesiser to my studio, the Moog Mavis, we’ve been looking at similar synths at class on this Creative Sound Projects element 2 and I think it will be very interesting to create the composition with a new synth in order to add some new information to the writing bit and also get inspired.

The Moog Mavis is DIY synth, that means that you receive a kit with all the different parts and has to be assembled by yourself, but this kit doesn’t include soldering. This is interesting in order to see which are the separated components of a synthesiser of these characteristics. Mavis is a monophonic analog semi-modular synthesiser, featuring a saw and pulse wave VCO, a classic Moog low pass filter, ADSR envelope, LFO and a wide patchbay to explore different modulations.

Project Blog 1 – Audio Culture

Today after class I went to the library and I borrowed this book “Audio Culture – Readings in Modern Music”. It is like a true bible of the Sound Arts, it features iconic essays and writings from great artists and academics like John Cage, Brian Eno, Pauline Oliveros, David Toop and Karlheinz Stockhausen among others and goes through different topics as interesting as electronic and experimental music, minimalism and even DJ culture. Very inspiring, I highly recommend it.

The cover art features an installation by Zimoun

PT 110 Lesson 10: Using Advanced Mixing Techniques Review and Discussion Questions

  1. How is the Do-To-Selected function useful? What keyboard modifier set is used to access Do-To-Selected functionality? To apply the same action to multiple tracks. opt-shift
  2. Describe the process of creating a drum submix. What kind of track is traditionally used as a submix destination? 1. TRACK > NEW Aux 2. Set output for all tracks that you want included in the submix to the same available mix bus using AUDIO OUTPUT PATH SELECTOR (opt-shift to do this to all of them at the same time) 3. Set the Input for the Auxiliary Input track to correspond to the internal Mix Bus chosen in step 2 using the AUDIO INPUT PATH SELECTOR. 4. Set the output of the auxiliary input track to your main stereo output using the AUDIO OUTPUT PATH SELECTOR. 5. Solo-safe the Auxiliary input track (cmd+click Solo button). An Aux track is usually used as a submix destination.
  3. What is the difference between a Basic Folder track and a Routing Folder track? Which kind is useful for sub mixing? A Basic Folder track is nothing more than a holding container for other tracks. If you do not need submixing, group processing and routing control, but you would like to collect tracks together for organisational purposes, use one of these. Although Basic Folder tracks provide MUTE and SOLO controls, constituent track signals do not pass through the Basic Folder track in anyway. Routing folders have the added advantage of being able to submix constituent tracks, routing audio similar to an Aux.
  4. What processes can you use to route the outputs of a set of tracks to a destination track ? 1. Route Tracks to New Folder checkbox in right-click menu) 2. Using AUDIO OUTPUT / INPUT SELECTORs (as Q2 above) with Routing to Buses or Routing to Tracks submenus.
  5. What is the purpose of grouping tracks? How many track groups can you create in a session? To organise and control a set of tracks by linking tracks and their controls104: in four banks of 26 Group IDs (a-z)
  6. What are some of the parameters that are affected by Edit groups? What are some of the parameters that can be included in a Mix group? Edit Groups: Track Views, Track Heights, Track Timebase, Elastic Audio assignments, Audio and MIDI editing functions, Playlist views, Selection based processing (i.e AudioSuite and Consolidate), Automation Editing. Mix Groups: Track Volume, Track Pan, Automation Mode Settings, Track Mute, Track Solo, Record Enable, Send Levels, Send Panning, Send Mute, Insert Controls (plug-in parameters)
  7. What is the keyboard shortcut to create a Mix or Edit group from selected tracks? cmd+G
  8. How can you enable or disable a track group? How can you globally suspend all groups? How can you visually tell when groups have been suspended? 1. GROUP LIST – click Group to toggle 2. GROUP LIST POP-UP > SUSPEND ALL GROUPS (or cmd+shift+G) 3. The Group list will be dimmed.
  9. How can you identify group membership of tracks in the Mix window? GROUP ID INDICATOR and its TRACKS pop-up menu.
  10. How can you quickly select all members of a group? How might this be useful? 1. Groups List: click column to the left of a group name. 2. GROUP ID INDICATOR > TRACKS pop-up menu > Select Tracks in Group.
  11. What are some options for modifying or deleting a group? Modify: 1. GROUP LIST POP-UP MENU > MODIFY GROUPS 2. MIX window: GROUP ID INDICATOR > MODIFY 3. Right-click group name in Group List > MODIFY Delete: 1. GROUP LIST POP-UP MENU > Delete Active Groups 2. MIX window: GROUP ID INDICATOR > DELETE 3. Right-click group name in Group List > DELETE
  12. What is the purpose of the ALL group? Can you modify track membership or delete this group? To apply global changes. Membership in the ALL group cannot be modified, nor can the group be deleted.
  13. When is it necessary to apply dither? Where should you insert a dither plug-in? When you are down-sampling, e.g a bounce down to 16-bit distribution ready .wav from a 24 bit/32 bit floating-point session. Insert on Master Fader.
  14. What is noise shaping used for in a plug-in? How is noise shaping used by the POW-r dither plug-in? Noise shaping helps improve the signal to noise ratio of dither. The process exploits the Fletcher-Munson loudness contour, which graphs the sensitivity of the human ear (in dB) across the frequency spectrum. POW-r noise shaping improves audio performance and reduces the perceptible noise inherent in dither by shifting noise components into a less audible range. (POW-r = Psychoacoustically Optimised Word-length reduction). Type 1: For solo instrument recordings, spoken-word i.e material with less stereophonically complex material with a narrow dynamic range. Type 2: for moderate stereophonic complexity (rock, pop). Type 3: Especially suited to material with a broad dynamic range. Designed for full spectrum, wide stereo field material (classical, orchestral)
  15. What are the steps involved in creating a session archive? Why is it important to use to the Save Copy In command for compacting sound files? 1. Clear unused clips from the session without permanently deleting any audio (See Lesson 7): CLIP LIST POP-UP MENU > SELECT UNUSED > CLEAR > REMOVE 2. Create Session Copy: FILE > SAVE COPY IN (this insures that all files needed for the archive are copied into the corresponding Audio Files and Video Files folders. This will also protect the original files against accidental data loss.) 3. Compacting sound files.CLIP LIST POP-UP MENU > SELECT ALL > COMPACT

PT 110 Lesson 9: Writing and Editing Automation Review and Discussion Questions

  1. What are some of the parameters that you can automate in ProTools? 1. Track Controls (Volume, Pan, Mute for Audio, MIDI, Instrument and Aux and Master Fader volumes. 2. Send Controls (Send Volume, Send Pan, Pan Mute) 3. All plug-in controls
  2. What are some of the differences between MIDI continuous control data and ProTools audio automation? What kind of tracks can ProTools audio automation be used on? MIDI: CC automation data is stored within the associated MIDI clip. Audio: although an audio track can have multiple alternate playlists (See Lesson three) an Audio track’s single automation playlist applies to all playlists on a track. Audio automation is used for Audio and Auxiliary track – it offers significantly higher resolution than MIDI CC automation.
  3. What selector can you use to set the automation mode for a track? Where is this selector located? Automation mode selector available in both the Mix and Edit windows.
  4. What is the difference between the Write, Touch, and Latch automation modes? 1. Write: Automation starts writing for all enable parameters when playback starts, overwriting any previous automation data. Writing stops for all parameters when playback stops2. Touch: Automation starts writing when an enabled parameter is being modified. Modified parameters only write automation while being held. Writing stops when modified parameters are released – the parameter returns to the previously automated value. 3. Latch: Automation starts writing when an enabled parameter is being modified. Modified parameters continue writing after being released. Writing stops for all modified parameters when playback stops.
  5. When might you suspend automation? What is the difference between the Suspend button and the Write Enable buttons? To obtain hands on control of parameters for an unfamiliar sessionSuspend: Suspends all writing and playing of automation for all tracks. Write Enable: Toggles writing of corresponding automation across session, has no effect on automation playbackWINDOW > AUTOMATION, cmd+4 (alphanumeric)
  6. What are the advantages of using Touch or Latch mode over using Write mode? In what scenarios would you use Latch mode? When would it make more sense to use Touch mode instead? Both Touch and Latch only write automation to parameters that are changed allowing you to be more selective. Latch: to set a parameter over long sections of a mix – perhaps useful for an initial automation pass. Touch: to touch up small sections of existing automation
  7. What are two ways to display an automation playlist in the Edit window? 1. TRACK VIEW SELECTOR 2. SHOW / HIDE LANES
  8. What are some common automation graphs that you may work with? How might automation graphs be different for different types of parameters, with respect to the available vertical positions? Audio (top to bottom): Volume graph (-INF to +12db) Mute graph (Mute / Not Muted), Pan (<100 to 100>), Send (Level, Mute, Pan) MIDI (0-127) (top to bottom): Velocity, MIDI Volume, MIDI Mute. MIDI Pan, Pitch bend, Aftertouch, Program change, SysEx, Controllers.
  9. What are some ways that the Grabber tool can be used to edit an automation playlist? How would you go about nudging automation break points? Click to create a break point. Drag up or down change the dB value, drag left or right adjust timing. opt-click: delete breakpoint. Select breakpoint(s) > choose nudge increment from the NUDGE VALUE POP-UP MENU in the Edit window toolbar: +/-alphanumeric
  10. What are some ways of the Pencil tool can be used to edit an automation playlist? Freehand, Line, Triangle, Square, Random (not Parabolic or S-curve)
  11. How is cutting automation data different from deleting automation data? Cut adds break points at the start and end of a selection, while the delete key will not
  12. What will be the result if you copy automation (Edit > Copy) from a track displaying Volume automation and paste it (Edit > Paste) on a track displaying Pan automation? Automation data pasted to the same automation graph that it originated from, even if the corresponding automation graph is not currently displayed on the target track.
  13. How would you go about duplicating the volume automation for a track onto Send B for the track? PASTE SPECIAL MODE
  14. How can you delete individual breakpoints in an automation graph? How can you delete a range of automation break points? 1. Grabber opt-click. 2. Select range >Delete
  15. How can you clear all automation on a displayed automation graph? What modifier can you use to clear all automation for a track? Triple click on the automation graph (or cmd+A (Select All) > Delete (ctrl+Delete to delete ALL automation on all automation playlists on the track(s) in the selected range). To clear automation from multiple tracks extend the selection across all of the target tracks. In such a case be sure that each track is displaying an automation graph

PT 110 Lesson 8: Basic Mixing and Signal Flow Review and Discussion Questions

  1. Where can you assign the colour coding that Pro Tools will automatically apply for tracks and clips? How can you display track colour bars in the Mix and Edit windows? SETUP > PREFERENCES> DISPLAY > Color CodingVIEW > MIX WINDOW VIEWS / EDIT WINDOW VIEWS >TRACK COLOUR or Mix / Edit Display Selector
  2. Describe the track icons used for the following track types in the Mix window: Audio, Aux Input, MIDI, Instrument, and Master Fader Audio (waveform), Aux (Down Arrow), MIDI (5-pin connector), Instrument (keyboard), Master (Sigma)
  3. What are some of the track status indicators available in the Edit window? Describe at least three. Task Manager IndicatorFreeze. Solo. Mute.
  4. How many inserts are available on a track in Pro Tools? Why is it important to consider the order in which inserts are arranged on a track? 10 (A-E, F-J). Pro Tools processes inserts in series adding each effect to the previous one from top to bottom
  5. Are inserts pre-fader or post-fader on Audio tracks, Instrument tracks and Aux input tracks? Are inserts any different on Master Fader tracks? Explain. Audio, Instrument and Aux inserts are Pre-fader. Master Fader inserts are post-fader.
  6. Are Sends pre-fader or post-fader on Audio tracks, Instrument tracks and Aux input tracks? Are sends any different on Master Fader tracks? ExplainCan be either pre or post. There are no sends on Master Fader track.
  7. How many sends are available on a track on Pro Tools? 10 (A-E, F-J)
  8. What is the difference between an Output Send and a Bus Send? When would you use each? 1. Output Send: routes a signal out of your audio interface e.g. through an external processor and back into your audio interface, or as a headphone mix. 2. Bus Send: uses internal mix bus to route signal to an Aux Input to be processed by a plug-in.
  9. What level does a send default to when it is first created? How can you change this default? Negative Infinity. SETUP > PREFERENCES > MIXING TAB > disable SENDS DEFAULT TO “-INF”
  10. What is the difference between standard view and expanded view for Sends? What keyboard modifier can you use to toggle between view modes by clicking a Send selector? Expanded View gives access to Send controls for all tracks in the Mix Window rather than an individual track in Standard View cmd+click
  11. How can you prevent a “return” track from muting when one of the source tracks is solo’d? What modifier key is used to enable this function? Solo Safe cmd-click the relevant Aux Return Tracks.
  12. What is the effect of enabling the PRE button in a Send window? What is the effect of enabling the FMP button? PRE = Prefader. FMP = Follow Main Pan
  13. How can you visually determine whether the inverse pan option is enabled for a Send? What button(s) will be highlighted? Both the Link and Inverse Pan buttons will be highlighted (on a stereo Send)
  14. How can you copy a send from one track to another track and duplicate its settings? What considerations might apply? opt-click and drag1. When moving or copying a Stereo Send from a Mono Track to a Stereo Track, any existing Send Pan automation will be dropped without warning. 2. When moving or copying a Stereo Send from a Stereo Track to a Mono Track, the Left Send Pan position/automation data is retained and the Right Pan data is dropped. A warning notification will appear. 3. When moving or copying a Send and replacing an existing Send, all automation on the existing Send will be replaced. A warning notification will appear
  15. Which type of plug-in effects are generally used on inserts? Which are generally used with sends? Why? Inserts are generally used for Gain-based processing (EQ, Compressor, Gate, Expander etc.) (though not always e.g parallel compression) Sends are generally used for Time-based processing (reverb, chorus, delay, etc) – so you can use a common effect for multiple tracks, it also makes more efficient use of processing resources.
  16. What is the Librarian menu used for in a plug-in window? What is displayed in the librarian menu when you first assign a plug-in? Why? Lets you select from available presets for the current plug-in. When a plug-in is first assigned it will have no preset selected and <factory default> will display.
  17. What are some of the uses of a Master Fader? How can you assign a Master Fader to the desired output or bus? They control the master levels of output and bus pathsThey can be used to do any of the following: 1. control and process output mixes. 2: monitor and meter an output level (e.g., a bus or hardware output) to guard against clipping. 3: Control sub-mix levels. 4: Control Effects Send levels. 5: Control levels on submasters (bussed tracks). 6: Apply dither or other inserts to all tracks sent to a common output or bus. Set the AUDIO OUTPUT PATH SELECTOR

PT 110 Lesson 7 Additional Editing and Media Management Review and Discussion Questions

  1. Describe the process of creating a clip loop. What are some of the options available in the clip looping dialogue box? Select an audio clip, MIDI clip or clip group, or select clips across multiple tracks. CLIP > LOOP
  2. What are the two ways that the Trim tool can be used to edit a Clip Loop? 1. If the tool is in the main part of the clip, the entire clip can be trimmed in or out adding or removing loop iterations as needed. (hold ctrl to override Grid mode if active)2. If the tool is in line with a Loop icon all iterations will be trimmed i.e. a loop pattern duration can be cut in half while the number number of iterations is doubled.
  3. How would you go about creating a loop from several separate clips on a track do you want to have repeat as a unit? Make a Selection and create a clip group, then loop this.
  4. What happens to clip loops when you choose the Clip > Ungroup All command? All loop iterations are flattened and all clip groups are ungrouped down to the lowest nested level
  5. What is the difference between Absolute and Relative grid modes? When would you use each? In Absolute Grid mode moving any clip or MIDI note snaps to the current grid boundary. In Relative Grid mode, offsets from grid boundaries are preserved and can be moved according to the current grid unit.
  6. What is the purpose of Layered Editing mode? How can Layered Editing be enabled or disabled? You can stack clips on top of one another while retaining the freedom to move, trim, or delete the topmost clips without losing the underlying material 1. OPTIONS > LAYERED EDITING 2. Click the Layered Editing button in the Edit window toolbar.
  7. Do Audiosuite plug-ins provide real-time processing or non-real-time processing? When might you use Audiosuite processing instead of a plug-in insert? Non-real time. Used to conserve real time processing resources
  8. What does the USE IN PLAYLIST button do in the Audiosuite plug-in window? How can you tell when this option is active? It controls whether the processed audio will replace your selection on the track. When deselected (grey) processed audio will appear only in the Clip List, when selected (blue) the processed audio will appear on the track playlist.
  9. Explain the difference between applying Audiosuite processing as Clip by Clip versus Entire Selection. These two Processing Input Modes determine how the selection will be analysed for processing. Clip by Clip analyses each clip in a selection individuallyEntire Selection analyses an entire selection as if it were a single complete clip.
  10. Why is it important to consider Handle Length when processing with an Audiosuite plug-in? What types of processing to be affected by Audiosuite handles? Audiosuite Handles are not available when the Processing Output Modes is set to Overwrite Files or Create Individual Files while Processing Input mode is set to Entire selection. In such cases processing is applied to the selection only. In contrast, when the Input Mode is set to Clip by Clip and the Output Mode is set to Create Continuous File, Audiosuite handles are applied to underlying audio material outside selection boundaries. If the Input mode is set to Entire Selection, the handles are applied using only the audio exposed within selected clips. EspRelevant for Reverb, Delay.
  11. What modifier key can you use to audition a clip in the Clip List? opt-click
  12. How could you set the Clip List for a session you just opened to display only your newly recorded and edited clips going forward? CLIP LIST POPUP MENU >FIND > INCLUDE SUBSEQUENTLY ADDED CLIPS
  13. What are some options for selecting clips in the clip list? How can you select a range of contiguous clips? How can you select non-contiguous clips? 1. Selecting multiple clips. 2. Selecting Unused Clips. 3. Offline to select all clips that reference files cannot be located on a mounted volume. Contiguous: Click the name, shift-click the last in list. Non-contiguous: Hold cmd
  14. What is the difference between Removing Clips versus Moving to Trash or Deleting clips using the Clear command in the clip list? Remove clears the unused clips from the session while leaving parent files in the Audio Files folder (or their current location). Move to Trash removes clips and moves associated files to the trash. Delete removes the clips and permanently deletes associated files from disk.
  15. What are some options for making selections or subset clips available outside of the current session? What is the purpose of using the Capture command when exporting clips? EDIT > Consolidate Clip. The new clip will be selected in the Clip List. (Optional) Right click on the clip and choose Reveal in Finder CLIP > CAPTURE (cmd+r) lets you create a new subset clip in the Clip List without making a separation on the trackAfter capturing a clip it can be exported as an audio file CLIP LIST POP-UP MENU > EXPORT CLIPS AS FILES (any wholesale subset audio clips in the clip list can be exported in this manner)